sketching2025badge
PublicLoading 3D model… large boards can take a moment.
Sketching2025badge
Badge for Sketching in Hardware 2025
Features
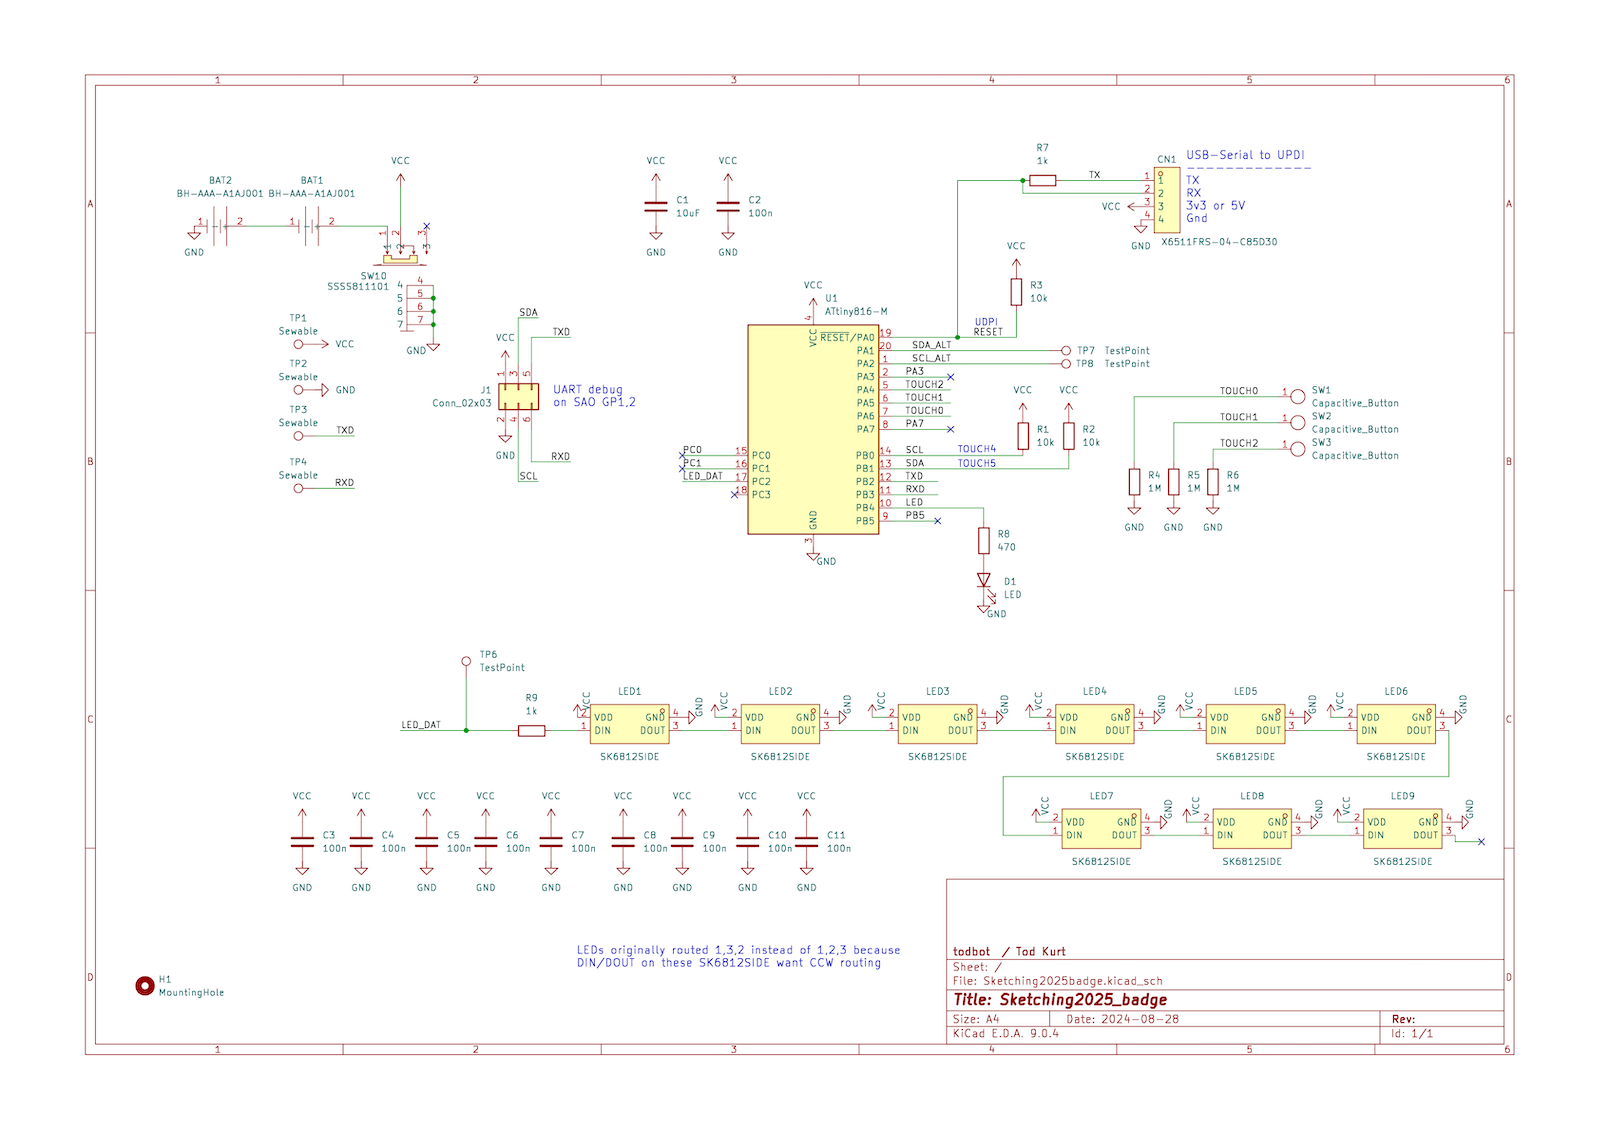
- Three (3) capacitive touch pads
- Nine (9) "Neopixel"-compatible side-light RGB LEDs that shine through the back
- Four (4) sewable connectors: V+, Gnd, TX (PB2), and RX (PB3)
- One status LED on back of board
- Standard SAO pinout w/ I2C. Spare GPIO lines wired to UART TX/RX
- ATtiny816-based, same as seesaw boards
- Easy compilation using standard Ardiuno toolchain and megaTinyCore
- Programmable with UDPI with a USB-Serial adapter
- Uses modified TouchyTouch captouch library, included
ATtiny816 pins used
| Use | GPIO | Arduino pin |
|---|---|---|
| Status LED | PB4 | 5 |
| Neopixel LEDs | PC2 | 12 |
| Touch pad 0 | PA6 | 0 |
| Touch pad 1 | PA5 | 1 |
| Touch pad 2 | PA4 | 2 |
| SAO I2C SCL | PB0 | 9 |
| SAO I2C SDA | PB1 | 8 |
| Sew / SAO UART TX | PB2 | 7 |
| Sew / SAO UART RX | PB3 | 6 |
Reprogramming the badge
The default firmware is a fun little demo. But you can extend or replace it.
For details see docs/firmware-install.md
But basically:
- Open up Arduino, add http://drazzy.com/package_drazzy.com_index.json to the Board Manager URLs in Settings.
- Load "firmware/Sketching2025badge_attiny816/Sketching2025badge_attiny816.ino"
- Set the chip & programmer settings as in firmware-install.md
- Upload code with "Sketch" -> "Upload Using Programmer"
Protective "Backer"
Since the LEDs and MCU on the back don't have the protection of the battery holders as standoffs, a 3d-printed "backer" is included with the badge. It snaps onto the badge using the sewable holes. It can be removed by lifting it out, if you want to sew the badge down or otherwise use the sewable holes.
See the "enclosure" directory for STEP/STL to print your own.
Demos
-
30Aug2025 - Prototyp0 PCBA w/ batts on face, from JLC (with oops mask hole in center)
https://github.com/user-attachments/assets/092c7233-f480-4e2a-861c-cc95c8bd24c3
Renders
-
1 Oct 2025 - production version
-
16Aug2025 - Render0 - refaced TouchWheelSAO, basic graphics layout on 100mm (4") circular PCB, all components on back, routing incomplete
https://github.com/user-attachments/assets/017a1953-9797-4b04-9c11-582e099e5368
-
16Aug2026 - Render0a - same as above, but with AAA holders on top
https://github.com/user-attachments/assets/b0e8170d-4cca-4846-9cb0-e9c19dae7c72
Schematic
No comments yet. Be the first to ask about this board.