wirsa
PublicLoading 3D model… large boards can take a moment.
RetroDisks WiRSa v3 - WiFi RS232 Serial Modem Adapter
The WiRSa v3 is a WiFi-to-RS232 serial adapter designed for legacy computing systems. It allows vintage computers to connect to modern networks via WiFi, supporting telnet BBS connectivity, file transfers, and network gateway functionality.

Kits & assembled units available for sale
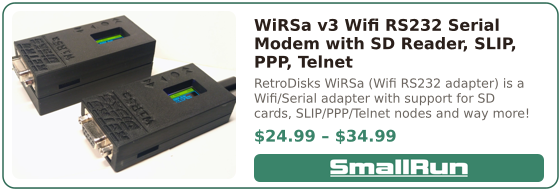
If you prefer to save yourself some time, I have some units (fully assembled or kit) available for sale. I had quite a few PCB's made up and I am trying to keep these as cheap as possible. You can purchase on SmallRun.
Features
Hardware
- Processor: ESP-WROOM-32D with WiFi and Bluetooth 4.2 BLE
- Display: 128x64 two-color OLED display for settings, commands, and real-time data
- Serial Port: Female DB9 (DE9) connector
- Full RS232 Breakout:
- DSR/DTR (Data Set Ready / Data Terminal Ready)
- RTS/CTS (Request to Send / Clear to Send)
- DCD (Data Carrier Detect)
- RI (Ring Indicator)
- Storage: Built-in micro SD card reader for file transfers and text playback
- Power:
- USB-C power connector
- Optional 2000mAh 3.7V Li-Po battery (~14 hours runtime)
- Navigation: Four physical buttons for menu navigation
Operating Modes
- MODEM Mode - Hayes-compatible AT command modem emulation for telnet/BBS connectivity
- Telnet Server - Built-in telnet server allows for remote terminal access
- File Transfer - Binary file transfer directly from SD card via XModem, YModem, and ZModem protocols
- Text Playback - Display text files from SD card through the serial port
- PPP Gateway - Point-to-Point Protocol gateway for TCP/IP networking
- SLIP Gateway - Serial Line Internet Protocol gateway
- Utilities - Diagnostics and troubleshooting tools including signal monitoring and loopback testing
- Config - Settings for baud rate, serial configuration, display orientation, and more
Software Features
- AT Command Set - Full Hayes-compatible modem commands
- Web Interface - Built-in web server for status monitoring, configuration and file management
- Flow Control - Hardware (RTS/CTS) and software (XON/XOFF) flow control
- Speed Dial - 10 programmable speed dial entries
- PETSCII Translation - Support for Commodore computers
- Telnet Protocol - Automatic Telnet IAC handling
- OTA Updates - Over-the-air firmware updates via HTTP
Getting Started
WiFi Configuration
- Connect to your computer via serial port (default: 9600 baud, 8N1)
- Enter your WiFi credentials using AT commands (2.4 GHz networks only):
AT$SSID=YourNetworkName AT$PASS=YourPassword - Save settings:
AT&W - Reboot or reconnect to apply
Connecting to a BBS
Use the dial command with the host and port:
ATDT bbs.example.com:23
Or configure speed dial entries:
AT&Z0=bbs.example.com:23
ATDS0
Useful AT Commands
| Command | Description |
|---|---|
AT | Test connection (returns OK) |
ATDT<host:port> | Dial/connect to TCP host |
ATDS<0-9> | Speed dial entry |
ATH | Hang up connection |
ATA | Answer incoming connection |
ATO | Return online from command mode |
+++ | Escape to command mode (during connection) |
ATE0/1 | Echo off/on |
ATV0/1 | Verbose results off/on |
ATI | Display network info |
AT&V | View current settings |
AT&W | Save settings to EEPROM |
ATZ | Load settings from EEPROM |
AT&F | Restore factory defaults |
AT&K<0/1/2> | Flow control (0=none, 1=hardware, 2=software) |
ATNET<0/1> | Telnet protocol handling off/on |
ATPET=<0/1> | PETSCII translation off/on |
AT$SSID= | Set WiFi SSID |
AT$PASS= | Set WiFi password |
AT$SP=<port> | Set listening port |
ATS0=<0/1> | Auto-answer off/on |
ATFC | Check for firmware updates |
ATFU | Perform firmware update |
AT? or ATHELP | Display help |
ATX | Exit MODEM Mode, return to WiRSa main menu |
File Transfers
The WiRSa supports binary file transfers directly from the SD card using industry-standard protocols:
- XModem - Basic 128-byte block transfer with checksum
- YModem - Batch file transfer with filename and size
- ZModem - Streaming protocol with CRC16/CRC32 and automatic resume
To transfer files:
- Insert SD card with files
- Select "File Transfer" from the main menu
- Choose the transfer protocol
- Select send or receive
- Initiate the transfer from your terminal software
SLIP / PPP Gateway Modes
The WiRSa provides full TCP/IP networking capabilities for vintage computers through two standard protocols: SLIP (Serial Line Internet Protocol) and PPP (Point-to-Point Protocol). These modes turn the WiRSa into a dial-up internet gateway, allowing retro systems to browse the web, use email clients, FTP, and access other network services.
How It Works
Both modes operate as NAT (Network Address Translation) gateways:
- The vintage computer connects via the serial port
- The WiRSa performs NAT translation between the serial link and WiFi
- Outbound traffic is routed to the internet via the ESP32's WiFi connection
- The vintage computer appears to have full internet access
SLIP Mode
SLIP is a simpler, older protocol with less overhead. It works well with:
- DOS with packet drivers (ETHERSLIP, SLIPPER, etc.)
- Early Windows 3.x with Trumpet Winsock
- Classic Mac OS with MacSLIP or InterSLIP
- Linux with
slattach
Default Configuration:
- Gateway IP: 192.168.7.1 (WiRSa)
- Client IP: 192.168.7.2 (vintage computer)
- DNS: 8.8.8.8
PPP Mode
PPP is more robust with built-in negotiation, authentication support, and error detection. It's the standard for:
- Windows 95/98/ME Dial-Up Networking
- Windows 3.11 with Microsoft DUN
- Mac OS 8/9 with PPP/Remote Access
- Linux with
pppd
Default Configuration:
- Gateway IP: 192.168.8.1 (WiRSa)
- Client IP: 192.168.8.2 (assigned to client)
- Primary DNS: 8.8.8.8
- Secondary DNS: 8.8.4.4
Entering SLIP/PPP Mode
From the WiRSa Menu: (if your host OS is expecting an "always on" connection)
- Navigate to "PPP Gateway" or "SLIP Gateway" from the main menu
- Select "Start Gateway"
Using AT Dial Commands: (must set the device to Modem Mode first)
ATDT SLIP      - Enter SLIP mode
ATDT 7547      - Enter SLIP mode (phone keypad for "SLIP")

ATDT PPP       - Enter PPP mode
ATDT 777       - Enter PPP mode (phone keypad for "PPP")
Using AT Commands: (must set the device to Modem Mode first)
AT$SLIP        - Enter SLIP mode directly
AT$PPP         - Enter PPP mode directly
Port Forwarding
Port forwarding allows incoming connections from the internet to reach services running on your vintage computer. This is useful for:
- Hosting a BBS - Run a BBS on your vintage computer accessible from the internet
- FTP Server - Share files from your retro machine
- Web Server - Host a vintage web server (Windows 95 Personal Web Server, etc.)
- Game Servers - Host multiplayer games on classic systems
- SSH/Telnet Access - Remote into your vintage computer
Configuring Port Forwards:
From the menu:
- Enter SLIP or PPP Gateway menu
- Select "Port Forwards"
- Choose "Add Forward"
- Enter protocol (TCP/UDP), external port, internal IP, and internal port
Using AT commands:
AT$SLIPFWD=TCP,80,80      - Forward TCP port 80 to client port 80
AT$SLIPFWD=UDP,53,53      - Forward UDP port 53 (DNS)
AT$SLIPFWDDEL=0           - Remove forward at index 0

AT$PPPFWD=TCP,23,23       - Forward TCP port 23 (telnet)
AT$PPPFWD=TCP,21,21       - Forward TCP port 21 (FTP)
AT$PPPFWDDEL=0            - Remove forward at index 0
Note: Port forwards are shared between SLIP and PPP modes and persist across reboots.
Setting Up SLIP Under DOS
Requirements:
- MS-DOS, DR-DOS, FreeDOS, etc
- A SLIP packet driver (ETHERSLIP, SLIPPER, or CSLIPPER)
- TCP/IP applications (mTCP suite, Arachne or MicroWeb browser, NCSA Telnet, etc.)
Step 1: Configure WiRSa
AT$SSID=YourWiFiNetwork
AT$PASS=YourPassword
AT&W
Step 2: Install Packet Driver
Create a batch file (e.g., SLIP.BAT):
@echo off
REM Load SLIP packet driver on COM1 at 115200 baud
ETHERSL 0x60 4 0x3F8 115200
REM Or for COM2: ETHERSL 0x60 3 0x2F8 115200
Step 3: Configure TCP/IP Stack
For mTCP, create MTCP.CFG:
PACKETINT 0x60
IPADDR 192.168.7.2
NETMASK 255.255.255.0
GATEWAY 192.168.7.1
NAMESERVER 8.8.8.8
Set environment variable:
SET MTCPCFG=C:\MTCP\MTCP.CFG
Step 4: Connect
On the WiRSa, start SLIP Gateway by enabling from the buttons/screen menu, from the serial menu (exit terminal after Starting Gateway, it starts immediately), or by dialing
ATDT SLIP
Step 5: Test Connection
PING 8.8.8.8
TELNET bbs.example.com
Setting Up PPP Under Windows 95/98 Dial-Up Networking
Step 1: Create a New Connection
- Open "My Computer" → "Dial-Up Networking"
- Click "Make New Connection"
- Name it "WiRSa Internet" (or any name)
- Select your serial port modem (or "Standard Modem" on the COM port)
- For phone number, enter:
PPP(or777)
Step 2: Configure the Connection
- Right-click the new connection → "Properties"
- General tab: Ensure correct modem/port is selected
- Server Types tab:
- Type of Dial-Up Server: "PPP: Internet, Windows NT Server, Windows 98"
- Uncheck "Log on to network" (unless needed)
- Check "Enable software compression" (optional)
- Check "TCP/IP" under Allowed network protocols
- Uncheck NetBEUI and IPX/SPX unless needed
- Click "TCP/IP Settings":
- Select "Server assigned IP address"
- Select "Server assigned name server addresses"
- Click OK
Step 3: Modem Settings
- Go to Control Panel → Modems → Properties
- Set maximum speed to match WiRSa baud rate (115200 recommended, plus Flow Control enabled [AT&K1])
- Under "Connection" tab, set 8 data bits, No parity, 1 stop bit
- Make sure to put the WiRSa into Modem mode before proceeding
Step 4: Connect
- Double-click the connection
- Leave username/password blank (or enter any values - WiRSa ignores auth)
- Click "Connect"
- The WiRSa will respond "CONNECT PPP" and negotiate the link
Step 5: Verify Connection
- Open a command prompt:
ping 8.8.8.8 - Open Internet Explorer and browse!
Setting Up PPP Under Windows 3.11
Requirements:
- Windows 3.11 for Workgroups
- Microsoft TCP/IP-32 or Trumpet Winsock
- Dial-Up Networking 1.0 for Windows 3.11
Step 1: Install TCP/IP-32
- Run Network Setup
- Add "Microsoft TCP/IP-32"
- Configure with DHCP or manual IP (the WiRSa will assign IPs)
Step 2: Configure RAS (Remote Access Service)
- Install RAS if not present
- Add your modem on the appropriate COM port
- Create a new phonebook entry with phone number "PPP" or "777"
Step 3: Connect
- Open Remote Access
- Select your WiRSa entry
- Make sure WiRSa is in Modem Mode
- Click "Dial"
Setting Up SLIP Under Linux
Linux has built-in SLIP support via the slattach utility. This guide covers configuring the serial port, enabling SLIP, and testing connectivity.
Requirements:
- Linux system with a physical serial port (directly connected to WiRSa)
- Root/sudo access
slattachutility (usually included innet-toolsorslippackage)
Step 1: Identify Your Serial Port
First, identify the serial device. Physical serial ports are typically:
# First serial port (COM1 equivalent)
/dev/ttyS0

# Second serial port (COM2 equivalent)
/dev/ttyS1

# List available serial ports
ls -la /dev/ttyS*

# Check which serial ports are available
dmesg | grep -i ttyS
Step 2: Configure the Serial Port
Before starting SLIP, configure the serial port to match your WiRSa settings. Use stty to set the baud rate and other parameters:
# Set baud rate to 115200, 8N1, no flow control
sudo stty -F /dev/ttyS0 115200 cs8 -cstopb -parenb raw -echo

# For hardware flow control (if WiRSa has AT&K1 enabled), add crtscts:
sudo stty -F /dev/ttyS0 115200 cs8 -cstopb -parenb raw -echo crtscts

# Verify settings
stty -F /dev/ttyS0 -a
Key stty options:
| Option | Description |
|---|---|
115200 | Baud rate (match WiRSa setting) |
cs8 | 8 data bits |
-cstopb | 1 stop bit (use cstopb for 2) |
-parenb | No parity |
raw | Raw mode (no input/output processing) |
-echo | Disable local echo |
crtscts | Enable hardware flow control |
Step 3: Test Serial Communication
Before enabling SLIP, verify you can communicate with the WiRSa:
# Open a simple terminal session
# Press Ctrl+C to exit when done
sudo cat /dev/ttyS0 &
echo "AT" | sudo tee /dev/ttyS0

# You should see "OK" response from WiRSa
# Kill the background cat process
kill %1

# Alternative: use screen or minicom
screen /dev/ttyS0 115200
# (Press Ctrl+A then K to exit screen)
Step 4: Start SLIP Gateway on WiRSa
From your terminal session with WiRSa, enter SLIP mode:
AT$SLIP
Or dial into SLIP mode:
ATDT SLIP
You should see "CONNECT SLIP" response. Now exit your terminal program (the serial port must be free for slattach).
Step 5: Enable SLIP on Linux
Attach the SLIP interface using slattach:
# Start slattach in the background
# -p slip = SLIP protocol
# -s 115200 = baud rate
sudo slattach -p slip -s 115200 /dev/ttyS0 &

# Note the PID for later cleanup
SLATTACH_PID=$!
Step 6: Configure the Network Interface
Once slattach is running, a sl0 interface will be created. Configure it:
# Bring up the interface with the client IP
sudo ifconfig sl0 192.168.7.2 pointopoint 192.168.7.1 up

# Or using ip command (modern systems)
sudo ip addr add 192.168.7.2 peer 192.168.7.1 dev sl0
sudo ip link set sl0 up

# Add default route through the SLIP gateway (optional - routes all traffic through WiRSa)
sudo ip route add default via 192.168.7.1 dev sl0

# Or add only specific routes
sudo ip route add 8.8.8.8 via 192.168.7.1 dev sl0
Step 7: Configure DNS
Add the DNS server to your resolver configuration:
# Temporary - add to /etc/resolv.conf
echo "nameserver 8.8.8.8" | sudo tee -a /etc/resolv.conf

# For systems using systemd-resolved
sudo resolvectl dns sl0 8.8.8.8
Step 8: Test the Connection
Verify connectivity through the SLIP link:
# Ping the WiRSa gateway
ping -c 3 192.168.7.1

# Ping an external IP (Google DNS)
ping -c 3 8.8.8.8

# Test DNS resolution
ping -c 3 google.com

# Check routing
ip route show
Expected output for successful ping:
PING 192.168.7.1 (192.168.7.1) 56(84) bytes of data.
64 bytes from 192.168.7.1: icmp_seq=1 ttl=64 time=5.23 ms
64 bytes from 192.168.7.1: icmp_seq=2 ttl=64 time=4.89 ms
64 bytes from 192.168.7.1: icmp_seq=3 ttl=64 time=5.01 ms
Step 9: Cleanup (When Done)
To disconnect and clean up:
# Bring down the interface
sudo ip link set sl0 down

# Kill slattach
sudo kill $SLATTACH_PID
# Or find and kill by name
sudo killall slattach
Complete Setup Script
Here's a complete script to automate the Linux SLIP setup:
#!/bin/bash
# slip-connect.sh - Connect to WiRSa via SLIP

DEVICE="/dev/ttyS0"
BAUD="115200"
LOCAL_IP="192.168.7.2"
GATEWAY_IP="192.168.7.1"
DNS="8.8.8.8"

# Configure serial port
sudo stty -F $DEVICE $BAUD cs8 -cstopb -parenb raw -echo

# Start slattach
sudo slattach -p slip -s $BAUD $DEVICE &
sleep 2

# Configure interface
sudo ip addr add $LOCAL_IP peer $GATEWAY_IP dev sl0
sudo ip link set sl0 up

# Add route for external traffic
sudo ip route add default via $GATEWAY_IP dev sl0

# Configure DNS
sudo resolvectl dns sl0 $DNS 2>/dev/null || echo "nameserver $DNS" | sudo tee /etc/resolv.conf

echo "SLIP connection established"
echo "  Local IP:  $LOCAL_IP"
echo "  Gateway:   $GATEWAY_IP"
echo "  DNS:       $DNS"
echo ""
echo "Test with: ping 8.8.8.8"
Troubleshooting
| Issue | Solution |
|---|---|
| "Device or resource busy" | Another program is using the serial port. Close any terminal emulators. |
| No sl0 interface appears | Check if slattach is running: ps aux | grep slattach. Verify WiRSa is in SLIP mode. |
| Ping to gateway fails | Verify serial settings match WiRSa. Check cable connections. |
| External pings fail | Ensure WiRSa has WiFi connectivity. Check AT$SLIPSTAT for packet statistics. |
| Permission denied | Use sudo or add your user to the dialout group: sudo usermod -aG dialout $USER |
| Serial port not found | Ensure the serial port is enabled in BIOS/UEFI. Check setserial -g /dev/ttyS* for port status. |
Configuration AT Commands
SLIP Configuration:
| Command | Description |
|---|---|
AT$SLIP | Enter SLIP gateway mode |
AT$SLIPIP=x.x.x.x | Set gateway IP address |
AT$SLIPCLIENT=x.x.x.x | Set client IP address |
AT$SLIPDNS=x.x.x.x | Set DNS server |
AT$SLIPSHOW | Show current SLIP configuration |
AT$SLIPSTAT | Show SLIP statistics |
AT$SLIPFWD=proto,ext,int | Add port forward |
AT$SLIPFWDDEL=index | Remove port forward |
PPP Configuration:
| Command | Description |
|---|---|
AT$PPP | Enter PPP gateway mode |
AT$PPPGW=x.x.x.x | Set gateway IP address |
AT$PPPPOOL=x.x.x.x | Set client pool start IP |
AT$PPPDNS=x.x.x.x | Set primary DNS server |
AT$PPPDNS2=x.x.x.x | Set secondary DNS server |
AT$PPPSHOW | Show current PPP configuration |
AT$PPPSTAT | Show PPP statistics |
AT$PPPFWD=proto,ext,int | Add port forward |
AT$PPPFWDDEL=index | Remove port forward |
AT$PPPFWDLIST | List all port forwards |
Exiting SLIP/PPP Mode
- Press the BACK button on the WiRSa
- Send
+++escape sequence (USB serial only in SLIP mode) - Disconnect from the client side (PPP will detect link termination)
Telnet Server Mode
The WiRSa includes a built-in Telnet server that allows remote access to devices connected via the serial port. This is useful for:
- Vintage terminals and computers - Access systems that originally connected to serial terminals (mainframes, minicomputers, Unix systems)
- Serial console access - Remotely manage routers, switches, or embedded devices with serial management ports
- Headless systems - Access single-board computers or systems without displays
- BBS hosting - Run a BBS on a vintage computer and accept telnet connections
How It Works
- The WiRSa listens for incoming TCP connections on a configurable port (default: 23)
- When a connection is made, data is bridged bidirectionally between the telnet client and the serial port
- The remote user interacts with whatever is connected to the WiRSa's serial port as if they were locally connected
Configuration
Set the listening port:
AT$SP=23        - Set server port to 23 (default telnet port)
AT$SP=2323      - Use alternate port 2323
AT$SP?          - Query current port
Configure auto-answer:
ATS0=1          - Enable auto-answer (automatically connect incoming calls)
ATS0=0          - Disable auto-answer (ring and wait for manual answer)
ATS0?           - Query current setting
Telnet protocol handling:
ATNET1          - Enable telnet IAC sequence handling (recommended for telnet clients)
ATNET0          - Disable telnet handling (raw TCP mode)
ATNET?          - Query current setting
Connecting to the WiRSa
From any computer on the same network:
telnet <wirsa-ip-address> 23
Or with a custom port:
telnet <wirsa-ip-address> 2323
Console Mode vs Call Mode
The WiRSa supports two types of incoming connections:
Console Connection (First Connection):
- The first telnet connection becomes a "console" session
- Stays in AT command mode - you can type AT commands
- Use
ATDT <host:port>to dial out to BBSes - Full modem emulation available
Call Connection (With Auto-Answer):
- When
ATS0=1is set, subsequent connections bridge directly to serial - Data passes transparently between telnet and serial
- Use
+++to escape back to command mode - Use
ATHto hang up
Example: Remote Terminal Access
Scenario: You have a vintage Unix system with a serial console, and you want to access it remotely via telnet.
- Connect the WiRSa to the Unix system's serial port
- Configure WiRSa to match the system's serial settings:
AT$SB=9600 - Set baud rate (match your system) ATS0=1 - Enable auto-answer ATNET1 - Enable telnet handling AT&W - Save settings - From a remote computer, telnet to the WiRSa's IP address
- You'll be connected directly to the Unix system's serial console
Example: Hosting a BBS
Scenario: Run a BBS on a vintage computer and accept incoming telnet connections.
- Connect WiRSa to the vintage computer running BBS software
- Configure WiRSa:
AT$SP=23 - Listen on port 23 ATS0=1 - Auto-answer incoming connections ATNET1 - Handle telnet protocol AT&W - Save settings - Configure your router to forward port 23 to the WiRSa's IP address
- Users can now telnet to your public IP to access the BBS
Manual Answer Mode
When auto-answer is disabled (ATS0=0), incoming connections trigger a "RING" message:
RING
RING
RING
To answer manually, type:
ATA - Answer the incoming call
This is useful when you want to screen incoming connections or when the connected device needs preparation before accepting a connection.
Diagnostics
The Utilities menu provides diagnostic tools for troubleshooting:
- Signal Monitor - Real-time display of RS232 signal states (DCD, RTS, CTS, DTR, DSR, RI)
- Loopback Test - Test serial communication integrity
- Statistics - View connection counts and byte transfer statistics
Hardware Connections
Pin Assignments
| Function | GPIO | Description |
|---|---|---|
| RXD2 | 16 | UART2 RX (from computer) |
| TXD2 | 17 | UART2 TX (to computer) |
| DCD | 33 | Data Carrier Detect (output) |
| RTS | 15 | Request to Send (output) |
| CTS | 27 | Clear to Send (input) |
| DTR | 4 | Data Terminal Ready |
| DSR | 26 | Data Set Ready |
| RI | 25 | Ring Indicator |
| SD CS | 5 | SD Card Chip Select |
| SD MOSI | 23 | SD Card MOSI |
| SD MISO | 19 | SD Card MISO |
| SD SCK | 18 | SD Card Clock |
Navigation Buttons
| Button | GPIO | Function |
|---|---|---|
| SW1 | 36 | DOWN |
| SW2 | 39 | BACK |
| SW3 | 34 | ENTER |
| SW4 | 35 | UP |
Building the Firmware
This is a PlatformIO project. See README-PLATFORMIO.md for detailed build instructions.
Quick start:
# Build firmware
platformio run

# Upload to ESP32
platformio run --target upload

# Monitor serial output
platformio device monitor
Origin Story
The WiRSa originated as a film prop for Apple TV's "The Shining Girls," where it simulated realistic computer interaction by playing back pre-recorded text files while actors typed on vintage terminals.
Resources
- Source Code: Complete firmware, schematics (KiCAD), Gerber files, and enclosure designs (OpenSCAD) available in this repository
- Contact: [email protected]
License
MIT License - See source code header for full license text.
Copyright (C) 2026 Aron Hoekstra
No comments yet. Be the first to ask about this board.